
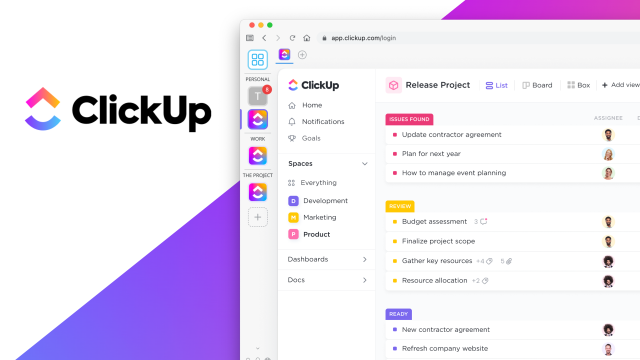

Client Edits ClickUp Instructions
This post outlines the complete process for submitting, managing, and resolving all website requests for
our clients through our collaborative ClickUp Board. The process is designed to ensure clarity, efficiency, and
accountability at every stage.

Find the “Add Task” button in the top right corner and press it. (Color of buttons may vary!) There is also a second “add task” at the bottom of the lists in the lower left corner.
A pop up will then appear where you can enter a “Task name” and description. The task name is what will show on list views so please keep it condensed. In the description, you can fill out any information that you need that will be helpful to our team replicating the issue. This includes (but is not limited to) text, links, screenshots, lists, files/attachments, etc.
That’s all you need to fill out! From here, our team will be reviewing the task you wrote and will let you know if there’s any questions, gaps, or issues replicating.


After you have your initial information, hit “Create task”

The task is now created and will be placed under “empty” which means our team needs to review it. Once the task is created you can fill out additional information such as client priority, the URL, category, user role, and steps to reproduce the issue from this list view.
ClickUp Board Organization and Field Definitions
| Field | Definition | Who Updates |
|---|---|---|
| Assignee | Indicates the individual actively responsible for the task at the current moment. For work assigned to Inverse Paradox (IP), this will typically be the Project Manager. Upon moving to “Ready for Client Review,” the Assignee shifts to the internal client staff member who created the task for final sign-off. | IP | Client |
| Status | These indicate where in the process this individual task item is. This should only be updated by Inverse Paradox. See more details below. | IP |
| Due Date | Due Date on the Parent Task indicates the expected completion date for the overall deliverable. Due Date on a parent task is defined as “Launched and deployed on the live website” whereas Due Date on sub-tasks is for completion of the activities. | Client |
| Priority | The urgency level of the request (e.g., Urgent, High, Medium, Low). This should be set by the client upon task creation. | Client |
| Time Estimate | Time Estimate is the total time estimated for the work, encompassing all subtasks. | IP |
| Client Status | This is the field that client and the creators of tasks should update. Inverse Paradox will help update as well if there is comments or a discussion on this during a weekly call. See more details below. | Client |
| Website | The specific website the requested work pertains to. This must be supplied when creating any new task. ** This field only applies to client with multiple website. ** | Client |
| Client Priority | This is where client can note the priority of a task. ** Only applies to some client as needed ** | Client |
That is all that is needed to create a task – all the other functionality is used by our team internally.
Inverse Paradox (IP) Status Definitions
These statuses are managed exclusively by Inverse Paradox and indicate the exact stage of the task within our development and review lifecycle.
| Status | Meaning | Action Required (IP) |
|---|---|---|
| Open | New request has been logged. | Review task for clarity and initial estimation planning. |
| Estimate – Ready | The request is being actively assessed for a time estimate. | Provide a written estimate and update status to Estimate – Provided. |
| Estimate – Provided | The time estimate has been posted and is awaiting client approval. | Wait for client to approve via comment or change to the Client Status: Estimate Approved. |
| Estimate – Conflict | Insufficient information is available to provide an estimate. | A comment will be posted outlining what additional information is needed. |
| Go Go Go! | The time estimate has been formally approved, and the task is prioritized for an upcoming sprint. | Schedule the task for the next available development sprint. |
| In Progress | The task is actively being worked on within the current development sprint. | Develop the solution; update internal subtasks. |
| Conflict | A critical roadblock has been hit that requires external input (e.g., from client). | Post a comment detailing the block and what is needed to resume. |
| Third Party Conflict | A roadblock caused by a dependency on a third-party application or service. | Communicate with the third party and await resolution. |
| Ready for Review | Internal validation process begins. The work is ready for initial internal review by the IP Project Manager. | Review work before advancing to Lead and PM validation. |
| Validated (Lead) | First step of the two-step internal validation is complete. | Move to Confirmed (PM) status. |
| Confirmed (PM) | Final internal quality assurance check by the Project Manager is complete. | Move to Ready for Client status and reassign to the client task creator. |
| Incomplete | Internal review found necessary revisions. | Work is returned to the developer for fixes and updates. |
| Deploy | The work has been client-approved and is now scheduled for deployment to the live environment. | Schedule deployment and notify the client upon completion. |
| Complete | The work is finished and live (if applicable). This item remains visible on the board. | Mark task as closed after a defined period, or upon client request. |
| Closed | The work is finished and is hidden from the main board view to maintain a clean workspace. | Task archives from the main view. |

Once our team is done the task and it has gone through all internal checks, we will moved it to “Ready for Client”. If you are reviewing any task while it is moving through our internal QA process (Ready for Review, Validated (Lead), Confirmed (PM), Incomplete) please note that there might be changes still in progress.
That will change the little box next to the task name yellow to grab your attention. When we move it to “Ready for Client” we will tag you in the comment section on the task which will notify you that it’s ready to be looked at. Please note you should be reviewing the build link on an incognito browser to avoid issues with caching. If you do not see an issue resolved, please reach out and we will flush the caches on our side to see if that helps the situation.
Client Status and Action Requirements
This is the key field for client staff to provide essential feedback and approval. Client staff are primarily responsible for updating this field.
| Client Status | Meaning | Action Required (Client) |
|---|---|---|
| Estimate Approved | Formal approval of the time estimate provided by IP. | Change to this status once you have reviewed an Estimate – Provided task. |
| Hold | The task is temporarily suspended by mutual agreement. | Change to this status when a task needs to be paused. |
| Conflict/Discuss | The task requires a deeper conversation (e.g., during a weekly call) to resolve an issue. | Change to this status to flag the item for discussion. |
| Third Party Conflict | The task requires coordination with an external vendor or partner. | Use this to signal an external dependency to IP. |
| Client Review | The task is ready for the task creator’s review. | Review the work based on the instructions/notes provided by IP. |
| Feedback Provided | The review is complete, but revisions are needed. | Post detailed feedback in the comments and change to this status. |
| Approved (Deploy) | The task is approved and needs to be deployed to the live environment. | Change to this status to initiate the IP Deploy process. |
| Approved (Complete) | The task is approved and is already live (or deployment is not needed). | Change to this status to signal the work is final and can be closed out. |
After you are done reviewing, there is a status for “Client Feedback” where you can let us know if a further edit is required (“Review – Edit”), a discussion is needed (“Requires Discussion”), or if everything looks good mark it “Approved (Complete)”. Any edits or discussion you would like to have can be put in the comments. This will then flag the IP team to review your feedback. If we have any questions, we will reach out to you by tagging you in a comment.
There are three tabs at the top of the board. When you add a task, you can see them in “Submission”. When we have things for you to review, you can go to “Feedback / Review” and see the tasks ready for review.

Task Structure and Communication
Parent Tasks and Subtasks
- Parent Tasks are the single source of truth for communication. All interaction between client and Inverse Paradox must occur on the Parent Task.
- Subtasks are strictly for Inverse Paradox’s internal organization (breaking down the work, assigning internal steps) and do not require client review or attention.